If you’re searching for answers about mouse dpi for competitive gaming, you’re likely trying to gain a real edge—not just tweak settings blindly. DPI can dramatically affect your aim consistency, reaction time, and overall in-game precision, yet many players either copy pro settings without understanding them or stick with defaults that hold them back.
This article breaks down what mouse dpi for competitive gaming actually means, how it impacts different genres like FPS and battle royale titles, and how to find the right balance between speed and control. We’ll cut through common myths, explain the relationship between DPI and in-game sensitivity, and show you how to optimize your setup based on tested performance principles.
Our insights are built on hands-on testing across multiple competitive titles, analysis of pro player configurations, and a deep understanding of gaming mechanics. By the end, you’ll know exactly how to dial in your DPI for sharper tracking, cleaner flicks, and more consistent results.
The Settings Showdown
Missed shots aren’t always a skill issue—they’re often a setup issue. High DPI vs low DPI is the debate.
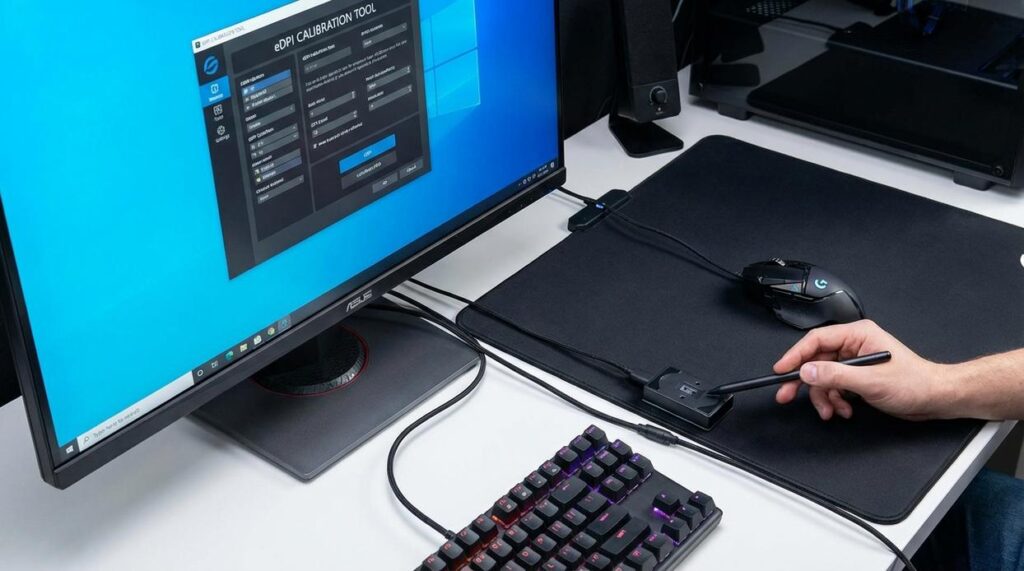
High DPI means faster cursor movement; low DPI means more physical hand movement. Add sensitivity, and you get eDPI (effective dots per inch), the measure of in-game speed.
Consider:
- High DPI + high sensitivity: lightning fast, harder to control.
- Low DPI + low sensitivity: steadier aim, more desk space required.
- Balanced eDPI: controlled flicks with consistency.
Pros standardize mouse dpi for competitive gaming to reduce variability (see https://example.com).
Test extremes, calibrate inward. Consistency wins.
The Core Components: Understanding DPI, Sensitivity, and eDPI
First, let’s define the basics. DPI (Dots Per Inch) refers to your mouse’s hardware sensitivity—how far the cursor moves on screen relative to physical movement. Higher DPI means less hand movement for more cursor travel. Think of it as gear ratio A: faster, twitchier response.
On the other hand, in-game sensitivity is a software multiplier. It adjusts how your game interprets that hardware input. Same mouse, different game? The feel can change instantly. This is gear ratio B: the in-engine adjustment layered on top.
Now here’s where comparisons matter. eDPI (Effective Dots Per Inch) equals DPI × in-game sensitivity. This is the true sensitivity number. For example, 400 DPI × 2.0 sensitivity = 800 eDPI. Meanwhile, 800 DPI × 1.0 sensitivity also = 800 eDPI. Different setups, identical effective speed.
Some players argue DPI alone defines performance. Not quite. Without factoring sensitivity, comparisons fall apart (like comparing miles to kilometers without converting).
So when discussing mouse dpi for competitive gaming, eDPI is the common language. It standardizes settings across players and titles.
Pro tip: match eDPI first, then fine-tune DPI for sensor stability and personal comfort.
Debunking the Myths: High DPI vs. Low DPI
Choosing between high and low eDPI (effective dots per inch, or your mouse sensitivity after in-game scaling) is a lot like choosing between a sports car and a pickup truck. Both get you where you’re going—just differently.
The Case for Low eDPI (Below 1000)
Low eDPI is the long, smooth brushstroke of aiming. Often tied to arm aiming, it favors sweeping forearm movements over quick flicks. As a result, you gain steadier crosshair placement and cleaner micro-adjustments—especially in long-range duels. Many pro FPS players use lower sensitivities for this reason (Liquipedia Pro Settings Database).
However, it demands space and effort. A 180-degree turn can feel like rowing a boat across your desk.
The Case for High eDPI (Above 1000)
High eDPI, by contrast, is more like sketching with your wrist. Movements are tight and fast. This allows rapid target switching and snappy reactions—great for close-quarters chaos.
But here’s the catch: higher sensitivity can introduce jitter, making pixel-perfect shots harder to control.
| eDPI Range | Strengths | Trade-Offs |
|————-|————|————|
| Below 1000 | Precision, stability | Needs space, larger movements |
| Above 1000 | Speed, quick flicks | Harder fine control |
So what about mouse dpi for competitive gaming? Ultimately, sensitivity is personal. Your desk space, grip style, and game mechanics matter more than internet debates. Some argue there’s a universal “best” setting. In reality, it’s more like shoe size—what fits you wins. For deeper gear synergy, see mechanical keyboard switches explained for serious gamers.
The Calibration Process: A Step-by-Step Guide to Finding Your Perfect eDPI
Finding your perfect eDPI (effective dots per inch, or the combined value of your mouse DPI and in-game sensitivity) isn’t just about comfort—it’s about performance. When dialed in correctly, your aim feels natural, your reactions become consistent, and you stop fighting your settings mid-match. In other words, you remove friction between intention and execution (and that’s where wins start stacking up).
Step 1: Establish a Baseline
First, set your mouse to 800 or 1600 DPI—both are common standards in competitive play. Then adjust your in-game sensitivity so that one full swipe across your mousepad equals a 360-degree turn. This gives you a measurable, repeatable starting point.
Some players argue there’s no “right” baseline and you should just copy a pro’s settings. However, what works for one player’s desk space, grip style, and reaction speed may sabotage yours. Starting neutral ensures your mouse dpi for competitive gaming fits your physical setup. The benefit? Immediate consistency.
Step 2: The Large Movement Test (180° Turns)
Next, test quick 180-degree turns. Place your crosshair on a fixed point, close your eyes, and flick to where you believe the opposite direction is.
If you under-turn, increase sensitivity. If you over-turn, lower it. Repeat until you consistently land on target.
Why this matters: clean 180s mean faster reactions to flanks—critical in tactical shooters and battle royales. You’ll waste fewer milliseconds correcting your aim (and fewer rounds wondering what happened).
Step 3: The Fine-Tuning Test (Target Flicking)
Now move to small, static targets. Flick between them rapidly.
Overshooting? Sensitivity’s too high. Feeling sluggish? Too low. Adjust in small increments.
This step sharpens micro-adjustments—the tiny corrections that separate casual players from highlight-reel plays. Think of it as tuning a guitar: slightly off feels terrible; perfectly tuned feels effortless.
Step 4: The Dynamic Test (Bot Tracking)
Then track moving bots smoothly, aiming to keep your crosshair glued to their heads.
If your aim shakes and over-corrects, lower sensitivity. If you can’t keep up, raise it slightly.
Smooth tracking translates directly to higher damage output and more consistent eliminations. Instead of panicking during strafes, you’ll feel in control.
Step 5: Lock It In and Build Muscle Memory
Finally—and this is crucial—stop adjusting.
Muscle memory (your brain’s ability to automate repeated movements) only develops through repetition. Give your settings at least a week. Constant tweaking resets progress.
Some players chase perfection daily. Ironically, that prevents improvement. Locking in builds confidence, speed, and precision over time.
And that’s the real payoff: less second-guessing, more winning.
Mastering Your Aim: The Final Calibration
You don’t need another pro’s settings. You need proof your setup works for you.
Most guides stop at recommending mouse dpi for competitive gaming ranges. That’s surface-level advice. The edge comes from calibrating around your arm sweep, desk space, and reaction speed—variables rarely discussed.
• Measure a full, comfortable swipe and map it to a 180-degree turn.
• Lock your eDPI for two weeks—no mid-match tweaks (yes, even after a bad round).
• Track hit consistency, not highlight clips.
Some argue micro-adjustments keep you adaptable. In reality, inconsistency kills muscle memory. Commit. Compete. Improve.
Level Up Your Precision and Dominate Every Match
You came here to finally understand how mouse dpi for competitive gaming impacts your accuracy, reaction time, and overall performance. Now you know how DPI influences micro-adjustments, tracking, flick shots, and muscle memory—and why dialing it in correctly can be the difference between clutching and choking.
The reality is simple: inconsistent sensitivity and poorly optimized settings are holding many players back. If your aim feels shaky, your tracking feels off, or you’re constantly overcorrecting, your DPI setup could be the silent problem sabotaging your grind.
The good news? You don’t have to guess anymore. Apply what you’ve learned. Test your DPI in controlled drills. Fine-tune your sensitivity based on your playstyle and game mechanics. Commit to one optimized setup and build muscle memory around it.
If you’re serious about climbing ranks and gaining a true competitive edge, start optimizing your gear today. We break down pro-level strategies, performance-tested settings, and data-driven gaming insights trusted by competitive players worldwide. Dive deeper now and turn your setup into your strongest weapon.
 Esports & Community Insights Editor
Karins Langisonz has opinions about scookie gaming mechanics deep dive. Informed ones, backed by real experience — but opinions nonetheless, and they doesn't try to disguise them as neutral observation. They thinks a lot of what gets written about Scookie Gaming Mechanics Deep Dive, Geek-Level Gaming Strategies, Gamer Gear Optimization Tips is either too cautious to be useful or too confident to be credible, and they's work tends to sit deliberately in the space between those two failure modes.
Reading Karins's pieces, you get the sense of someone who has thought about this stuff seriously and arrived at actual conclusions — not just collected a range of perspectives and declined to pick one. That can be uncomfortable when they lands on something you disagree with. It's also why the writing is worth engaging with. Karins isn't interested in telling people what they want to hear. They is interested in telling them what they actually thinks, with enough reasoning behind it that you can push back if you want to. That kind of intellectual honesty is rarer than it should be.
What Karins is best at is the moment when a familiar topic reveals something unexpected — when the conventional wisdom turns out to be slightly off, or when a small shift in framing changes everything. They finds those moments consistently, which is why they's work tends to generate real discussion rather than just passive agreement.
Esports & Community Insights Editor
Karins Langisonz has opinions about scookie gaming mechanics deep dive. Informed ones, backed by real experience — but opinions nonetheless, and they doesn't try to disguise them as neutral observation. They thinks a lot of what gets written about Scookie Gaming Mechanics Deep Dive, Geek-Level Gaming Strategies, Gamer Gear Optimization Tips is either too cautious to be useful or too confident to be credible, and they's work tends to sit deliberately in the space between those two failure modes.
Reading Karins's pieces, you get the sense of someone who has thought about this stuff seriously and arrived at actual conclusions — not just collected a range of perspectives and declined to pick one. That can be uncomfortable when they lands on something you disagree with. It's also why the writing is worth engaging with. Karins isn't interested in telling people what they want to hear. They is interested in telling them what they actually thinks, with enough reasoning behind it that you can push back if you want to. That kind of intellectual honesty is rarer than it should be.
What Karins is best at is the moment when a familiar topic reveals something unexpected — when the conventional wisdom turns out to be slightly off, or when a small shift in framing changes everything. They finds those moments consistently, which is why they's work tends to generate real discussion rather than just passive agreement.